Vibe Coder · Unit 18: Email, Payments and Commerce · Lesson 2 of 5
Taking payments with Stripe
Charge for your product without touching a card number. Products and prices, a Stripe-hosted checkout page, test mode, and one-time payments versus subscriptions.
Read the short notes and pictures.Do everything inside a blue frame.
Charging without handling cards
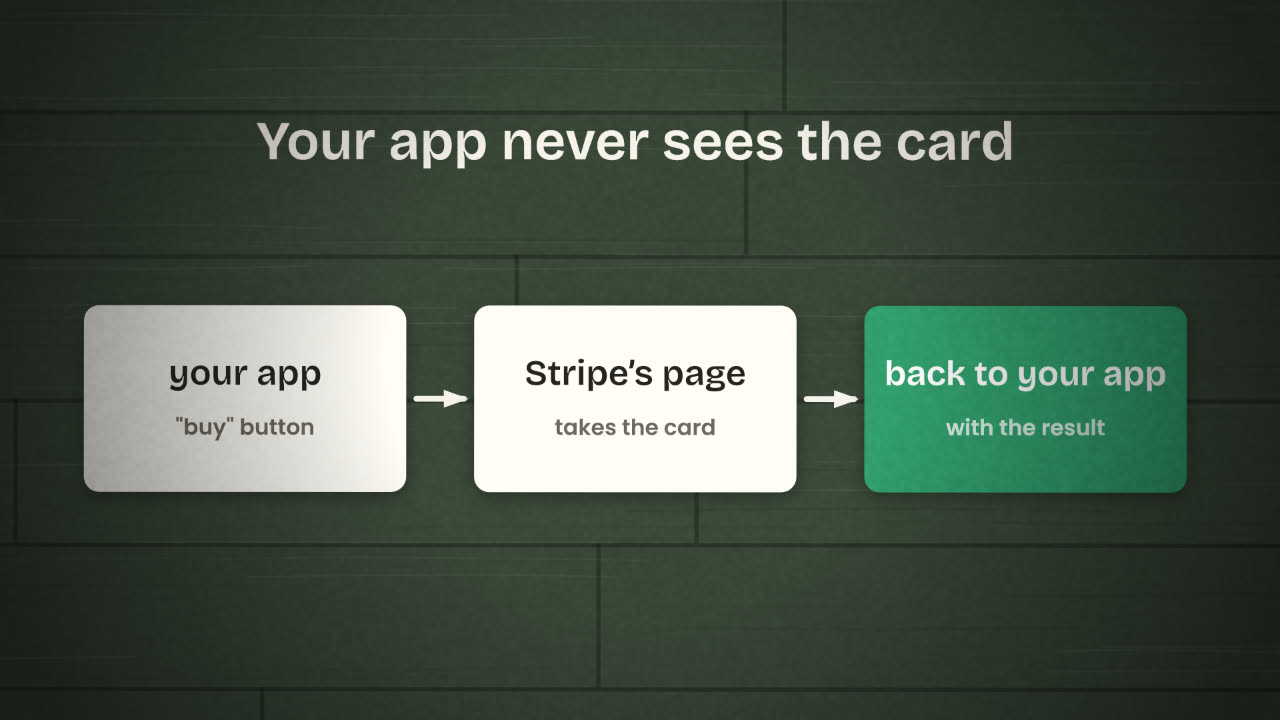
Taking payments sounds like the hardest part of a product. It used to be. With a payment provider you never store or even see a card number. The customer types it into a page the provider runs, and the provider tells your app what happened. Your job is to describe what you sell and to react correctly when someone has paid.
Products and prices
Product
What you sell: "Tally Studio plan".
Price
An amount and a currency attached to a product. A product can have several.
One-time
Charged once.
Recurring
Charged every month or year: a subscription.
Customer
Stripe’s record of a person who has paid you.
The checkout
Stripe Checkout is built on the Checkout Sessions API and comes in three forms: a full page, an embedded form and custom Elements. Stripe recommends the full page, which is hosted by Stripe or embedded, and it needs the least upkeep. Use that.
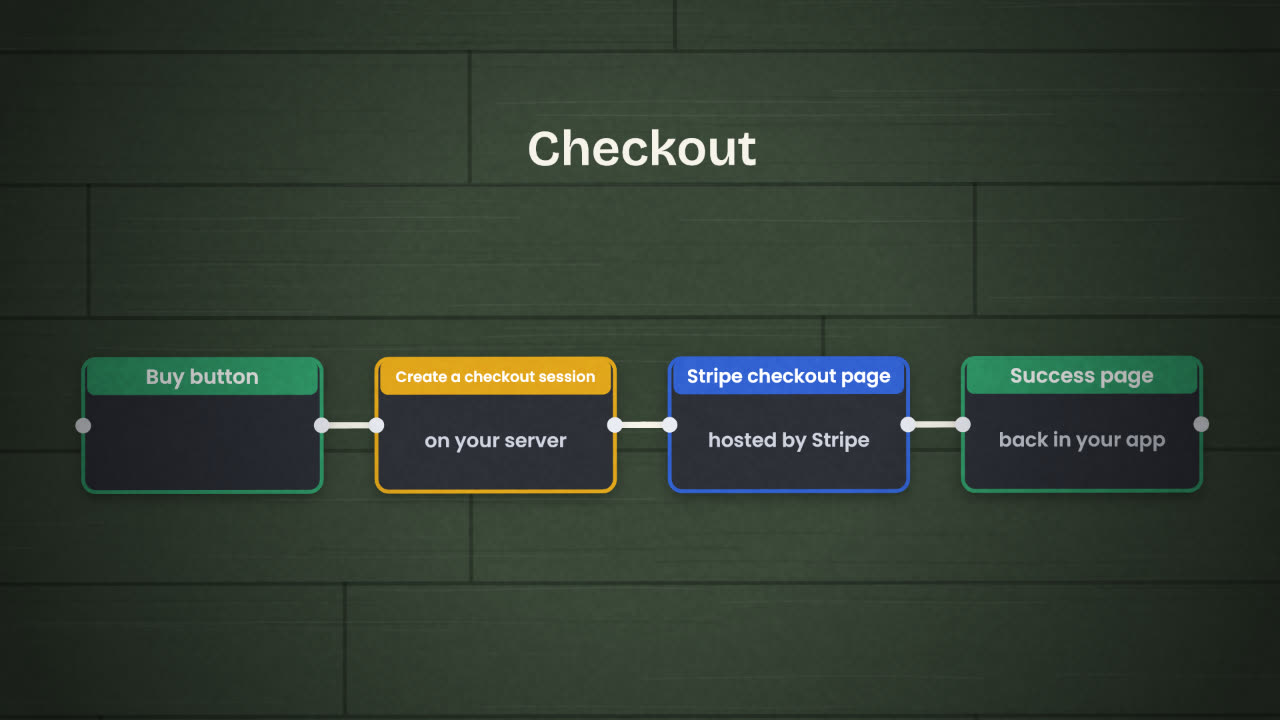
The user clicks "buy"
In your app.
Your server creates a checkout session
It tells Stripe which price, and which of your users is paying.
The user is sent to Stripe’s page
They pay there.
Stripe sends them back
To a success page in your app.
Stripe also tells your server
Through a webhook. That is the next lesson, and it is the part that matters.
No-code start
Create a product and price in the
dashboard.
Create a Payment Link.
Put the link on your landing page.
In your app
Ask your builder or coding agent:
"Add Stripe Checkout for the Studio
plan. Create the session on the server.
Attach the signed-in user’s id.
Send them to a success page after."
Keys and test mode
Publishable key
Safe in the browser.
Secret key
Server only. It can charge and refund. Treat it like a password.
Test mode
A separate set of keys and data. No real money moves.
Test card
In test mode, 4242 4242 4242 4242 with any future date succeeds.
Before you charge real money
Decide what you sell and for how much
One plan is enough to start.
Know your tax position
Rules depend on where you and your customers are. Stripe has tax tools, and a Managed Payments option that takes on tax compliance. Ask an accountant.
Write a refund policy
And link it at checkout.
Complete Stripe’s account verification
Before you can accept live payments.
Your product has a free plan and one paid plan at a monthly price. What do you create in Stripe, and what does your app need to remember about each user?
Add a checkout in test mode
In Stripe test mode, create your product and price. Add a buy button to your app that opens Stripe Checkout for the signed-in user and returns to a success page. Pay with the test card.
Done when
Paid features must stay locked for now. The next lesson unlocks them properly.
Keep these
- The customer pays on Stripe’s page; you never see the card.
- A product has prices: one-time or recurring.
- Build in test mode, and never trust the success page.